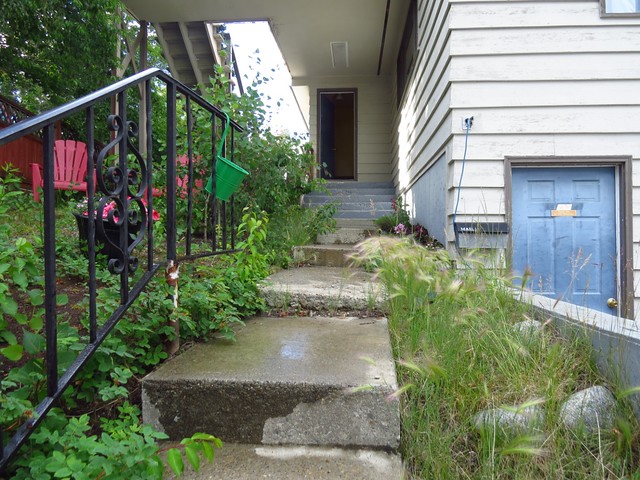
Wednesday, July 29, 2015

fo: SpringTastic Socks!

fo: SpringTastic Socks!
Oh my gosh, they're done!  I feel like I've been working on these forever, but I really only started them in early June, and they spent a lot of down time as I got charmed by other projects.  My declaration to complete some WIPs put them back on the radar, and after finishing the first sock, I whipped off the second sock in 9 days.  A quarter of that was done last night!

Manos Del Uruguay - Alergria
Pattern: SpringTastic Socks by Stefanie Goodwin-Ritter
Yarn: Manos del Uruguay Alegria
Mods: I started with the 9" sock for the width, but only knit 7" before doing the toe decreases for my size 7 feet.  I reduced the toe length by only knitting 6 decrease repeats (decrease 1 row, k 1 row), then decreasing every row for 6 rows.  I then sewed the toe closed with 28 stitches on the needles instead of 24 to reduce the point for my blunt toes.  The fit is perfect!
Here's my project page on Ravelry.

fo: SpringTastic Socks!
I admit, I didn't really like the cable and lace pattern when I first started it.  It's knit ankle down, so the pattern is upside down as you knit it.  It's not a symmetrical pattern at all, and it looks kind of kooky as you knit it, and I had no idea what the pattern had to do with spring.  But I was committed so kept going.  It was only when I tried them on to check the fit that I understood.

fo: SpringTastic Socks!
It's a basket filled with flowers! 

I was already sold on hand knit socks, but if I weren't these would've done it.  They're so adorable and beyond comfortable!  How have I gone so long wearing ill-fitted socks?  :)

fo: SpringTastic Socks!

Sunday, July 26, 2015

Dyeing Yarn with Black Beans

Yarn Dyeing with Black Beans
So uh, definitely enjoying the natural dyeing!  I read a few blogs where they'd managed to get blue (apparently a more difficult colour to get with natural dyes) using black beans.  Obviously I had to try!  I dumped a bunch of beans (about 4 cups?) in a bowl with enough water to cover the beans by about 2 inches, then left them alone to steep for 12 hours, stirring often.  It was interesting to watch the liquid change - first turning a light blue, then a deep shade of blue/purple, and eventually almost a deep green-blue.  As others have mentioned, the beans swell up a lot, so you have to make sure there's enough water in there.

Black Bean Dyeing
After straining out the liquid, I left it alone for a couple of hours to let the finer particulates settle out, and then I gently scooped out the liquid into a jar.  Dumped my already scoured and alum mordented yarn into the jar, sealed it up, and left it alone for a while.

And then after 36-ish hours, the liquid seemed to swell a bit, because boy did it start to leak out of my not-so-sealed jar and now I have blue dye all over the open shelves and floor below where I stored it.  That's about when I decided to pulled the out the yarn.

Black Bean Dyeing
It looked a lot darker when I pulled out the yarn, but a lot of the dye washed out.  It kept shedding dye until I gave it a vinegar bath, which seemed to halt the bleed.  And weirdly, turned the water purple.  I sort of want to play with this dye source some more and see what happens at different pHs.  This blogger got a gorgeous shade of blue GREEN with more acidic well water, which I suspect also had a healthy dose of iron oxide in it too.  (I hope that link works - it did as of yesterday, but it's giving me a hosting error right now).

Yarn Dyeing with Black Beans
I used a skein of undyed Earth Collection Nova, which is a 100% alpaca in DK weight.  The final result wound up being a gorgeous light shade of silvery blue. 

Yarn Dyeing with Black Beans
Obviously fibre plays a big roll in dye uptake, since the 100% wool yarn I used to tie off the skein turned a really appealing shade of dark blue.  I definitely want to use wool for this dye bath again!

Black beans...who knew!

Saturday, July 25, 2015

Today was a Creative Day! (and apparently a cleaning day...ick)

I've had a very busy day today.  Besides thoroughly cleaning the snot out of the living room (not literally) and helping the Boyfriend with the rest of the house, I pulled out some yarn sitting in a natural dye pot for the last few days...

Black Bean Dyeing
...tidied the sewing room and then messed it up again with a sewing project...

wip: Spotted Cardi
...added a pompom to a nearly finished hat (no photo)...

wip: SpringTastic Socks
...and made some decent progress on a sock.

Pretty good day in my books!  Now lets see if I can get this heel turned before I hit the sack, eh?

Friday, July 24, 2015

fo: Helix Hat and Mitts Set

Helix Hat and Mitts
You might remember this set, since I mentioned it during my WIP Name and Shame post.  You only saw the hat there, but I'd intended to make a complete set (so I don't count the mitts as a "new" project despite starting them after that post!).

These had to be a knitting priority because I need to get them mailed out early next week.  They're headed off to Manitoba for fundraising event at a family reunion in a couple of weeks.  See, my family has been meeting every other year at my cousin's property in Grand Beach, Manitoba.  And each time, my cousin rents an event tent.  This is getting expensive though, and while family do contribute, it makes more sense to buy our own for family events (weddings, funerals, reunions, etc).  So one of my more clever cousin's suggested doing a fundraising draw during the reunion to raise funds.

Sadly, I can't afford the $1200 ticket (!!!) it'd cost to go back for the weekend, but I wanted to contribute anyways - hence the hat and mitt set.

Plus I *ahem* wanted to try out this pattern.  :) 

Helix Hat and Mitts
I used a pattern my LYS store owner put together for a helix knitting class she held a while back.  No, there's not a bajillion ends to sew in - the stripes are knit continuously and stacked, so there's only the beginning and end to weave in.  It basically involves dividing the knitted tube (because this only works while knitting in the round) into 3 portions (or more! ...if you want to put yourself through that kind of pain) and, using 3 separate colours, knit around constantly pick-up and dropping colours at you reach new ones.

Or something.  I'm not a pattern writer for a reason - go check out this similar pattern if you want more details.

Helix Hat and Mitts
However way you write it, it's a lot of fun to do, if a little annoying since you're always handling 3 different balls of yarn - I was constantly tangled up in yarn.  It's a great stash buster though!  I used two tiny bits of cream and black in this, and I still have enough left over to make another pair of mitts or a hat!  Sadly, I didn't have enough of my left over grey to knit the mitts (although a bit of math later says I might've), but a quick jaunt to the LYS yielded a similar shade of grey.  You can barely tell!  (Right?!  I hope so, anyways.)

Helix Hat and Mitts
The mitts weren't part of the original pattern, but I just modified the Peakaboo Mitt pattern and added the helix knitting to it.  I love how the thumbs turned out, with a slight jog in the continuous stripes.  They're a good fit too - long enough to lend warmth to fingers and thumbs without interfering with movement.  Nothing drives me more batty than fingerless mitts extending too far over fingers and thumb!

Helix Hat and Mitts
For those curious, here's my Ravelry pages for the Helix Hat and Mitts.

Helix Hat and Mitts
I'm pretty chuffed with them, and I'll be sad to see them leave for Manitoba but I'm glad to be able to contribute to the fundraising - even if I can't deliver them myself.

Also, I really need to finish a pair of fingerless mitts for myself.  Those suckers are useful!

Monday, July 20, 2015

Dyeing Yarn with Indigo

Indigo Dyeing Kit
So uh, I might've found a new hobby.  Related hobby?  Let's go with that.  Remember a while back when I showed you what the owner of the Itsy Bitsy Yarn Store sent me home with?  Well, I decided that I wanted to try out yarn dyeing, but needed my hand held first.

Indigo dyeing kit
So I bought her indigo dyeing kit (and a book, but that's for another day).  And had a lot of fun this weekend.  The method used in indigo dying is different than other natural dyes, but the info booklet that came with the kit walked you through it beautifully, and it was nice to have good results right off the hop.

Here's a series of pictures of my adventure this weekend:

Indigo Dyeing Kit
After scouring the yarn (cleaning it). I was scared I'd have a tangled mess, but the loose knots held the skein together.

Indigo Dyeing Kit
Indigo stock, resting for an hour in a warm bath.
Indigo Dyeing Kit
Gently pouring the stock solution into the dye bath, trying to reduce bubbles as much as possible.  One of the chemicals added to both the stock and the bath is Thiourea Dioxide, which removes the oxygen from the water (and I think produces hydrogen sulphide, because boy does it reek of rotten eggs).  This is the only way that the indigo dye will bond with the fibre, so you have to make sure there's no added oxygen to the bath.
Indigo Dyeing Kit
Dye bath, chilling out on my front step for an hour.
Indigo Dyeing Kit
The dye bath itself is a yellow-green colour, but you can see where accidental air bubbles have oxidized the water blue.
Indigo Dyeing Kit
Pulling out the yarn after it's first dip.  Hard to see, but it came out a light green shade at first. 
Indigo Dyeing Kit
But this is where the magic happens, where exposure to oxygen turns it from green to blue!
Indigo Dyeing Kit
Light blueish green...
Indigo Dyeing Kit

Indigo Dyeing Kit

Indigo Dyeing Kit
...to blue!

Indigo Dyeing Kit
And here it is after it's first dip.  It looks dark, but if I'd rinsed it and let it dry, it'd be a lot lighter.
Indigo Dyeing Kit
Close up of the still-saturated bottom loop after the first dip.  I wanted a deeper blue, so put the yarn back into the bath for another 30 minutes. 
Indigo Dyeing Kit
Here it is after it's second dip.  Deeper, and a gorgeous shade, but I wanted to try for something even darker, if possible.
Indigo Dyeing Kit
And here's the yarn after it's 3rd dip.  It's hard to tell in these photos, but you could just see the dye sinking deeper into the yarn with ever dip, and I knew it'd stay this deep after rinsing this time.
Indigo Dyeing Kit
Here's a comparison, sort of a before and after photo.  The yarn on the right is the same shade that I started off with before dyeing.
I am seriously in love with the results.  Don't know yet what I'm going to knit it into, but I'm sure I'll find something.  The whole process was labour intensive, but so much fun, and I want to experiment more.  There's so many plants around - even in my back yard - that I could use, and I want to try it all! 

Because of course I need more yarn.  And another hobby.  :)

Have you tried your hand at dyeing, and specifically natural dyeing?  Willing to try out indigo dyeing after seeing my stunning results?

Friday, July 17, 2015

Happy First Birthday, Things I Make. Plus Rocks!

Wow, that title is not easy to use as a name, eh?  Whatever, I still love it.

Anywho, IT'S MY BLOG'S BIRTHDAY!  Which I just realized this afternoon so I'm a little unprepared.  Give me a few days though, and we'll have a little celebration:

I'M HAVING A (belated) BIRTHDAY GIVEAWAY!  


Once I figure out what I'm giving away, that is. :)

*~~*~~*~~*~~*

And for those wondering about yesterday's motivation, I did indeed go for an run this morning, and it was awesome(ly painful - but the good kind?).  In fact, I felt so good afterward, I decided to run the Black Street Steps! 


Photo Source
Well, I ran it once.  I'm regretting that decision a bit now, but I was proud to have done it.  I probably ran about 11 of the 12 sets of stairs, having walked half of two of the sections.  Considering how hard it was to walk it when i first arrived here, I'm pleased with how much stronger I am now (which is empowering all on it's own)!

Still, I may not be able to walk tomorrow...

Thursday, July 16, 2015

In Other News...


Not necessarily about sewing (although maybe a bit because I want to get into sewing my own exercise and running clothes) or knitting (unless you consider people who literally knit and run), but I can't stop looking at the latest cover of Women's Running.  The link's been open on my computer all day, and I keep going back to look at it.  According to this article, the magazine's been making a buzz because they chose to feature a plus-sized model for their August cover. 

It's apparently connected to an article about how popular athletic clothing brands are starting to provide more sizes of running gear (omg that's fantastic!), but also to show that not all runners are the lithe figures usually associated with runners.  The model here, Erica Schenk, has been running for a decade.

I...can't believe how inspiring this is!  I finally understand why people talk about the need for more representation in the media.  I mean, I've always understood in my head that representation of different types of people are important, but it's never hit me so hard as it did to see someone closer to my shape looking strong and powerful like this in a magazine.  

Whitehorse has a large community of very intense, hard-core runners.  I have a buddy who is a big time, dedicated marathon runner, who travels all over Canada and the USA for races.  She runs up to something like 75 km a week while in training, and she's pretty quick too.  But in her weekly running groups, which can number up to 60 people?  She's usually in the bottom 5 runners.  BOTTOM FIVE.  How does a beginner, and one in pretty poor shape, even start?  How the heck do you find the motivation, especially when you've been told before that "you have the wrong body for running"?

Well, this is one way.  I think I'm going to dust off my running shoes and hit the trails tomorrow morning.  :)  CONSIDER ME INSPIRED.

(And maybe also inspired to buy some patterns from Fehr Trade!)

Tuesday, July 14, 2015

My Northern (slightly feral) Garden

My Northern Garden 2015
Welcome to my home!
Since no one said no to a garden tour in my last post, I'm taking it as a 'yes please' and giving you a tour!  As you can see, I have a very well manicured yard!

My Northern Garden 2015
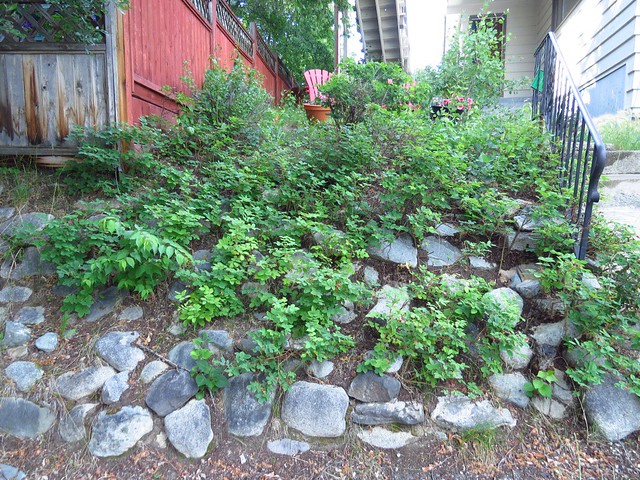
This is the stone retaining wall with an infestation of wild rose.  I 'trimmed' this area this spring by the fancy 'whatever survives the rake gets to stay' method.  It's actually a good source of rosehips in the fall, and I'm hoping to do some preserves with them this year! 

My Northern Garden 2015
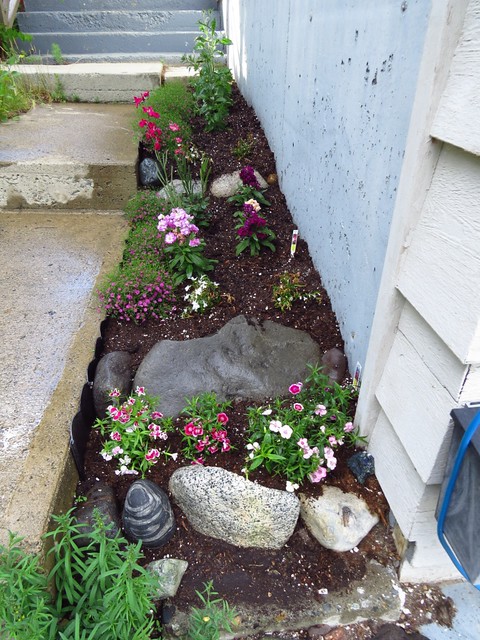
My planted garden leading up to the door.  This garden has been here forever, but I dug out the old dirt and replaced it with new rich soil this spring.  I love the rock tiers!


My Northern Garden 2015
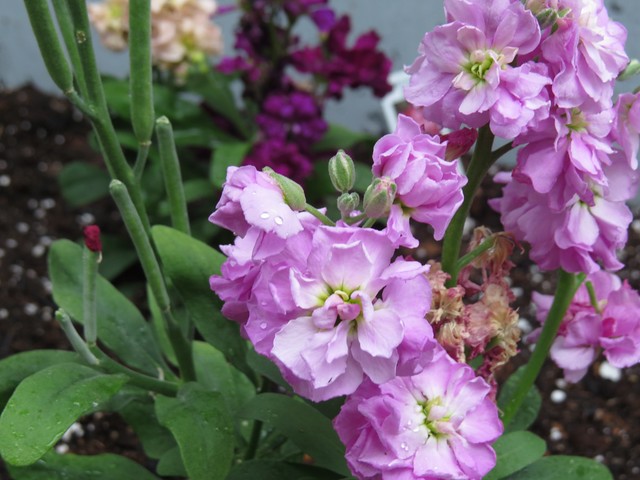
"Vintage Mix"  So pretty.

My Northern Garden 2015
Aster, about to bloom.

My Northern Garden 2015
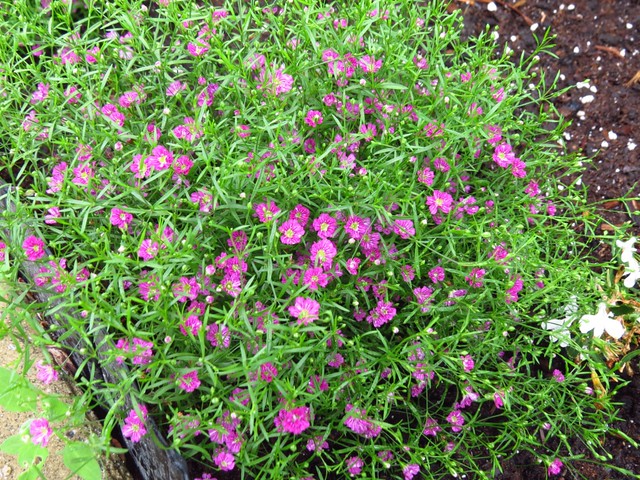
Baby's Breath.  Surprisingly in purple, despite the 'white' tag.  I'm good with it, because it's pretty.  The white bits are some Lobelia that's not doing so well.
These are some of my favourites in it so far.  I've been waiting ages for the Asters to bloom, and it looks like one is finally about to!

My Northern Garden 2015
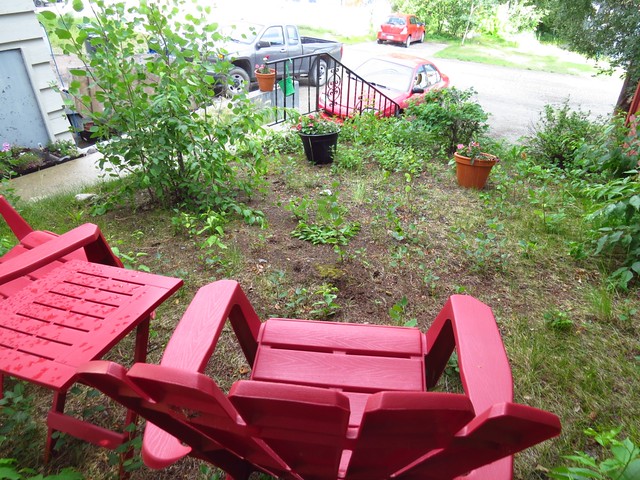
View of my lovely grass lawn.  Or erm, tree- and rose-shoot lawn.  And a couple of pots with Petunias (one of my favourite flowers).  I love sitting out here and reading and knitting.

My Northern Garden 2015
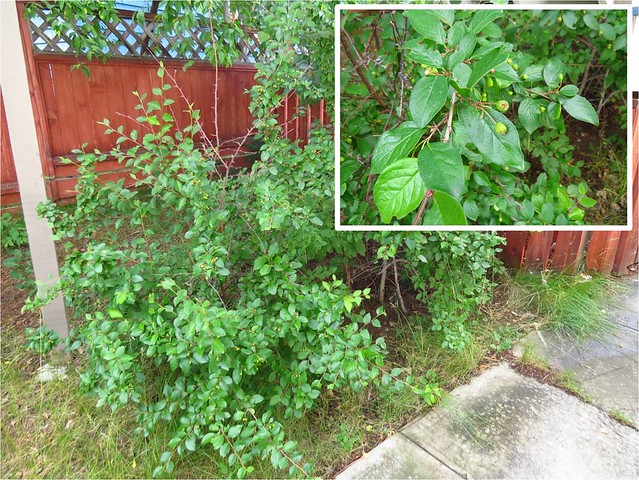
This is some sort of bush that grows behind the chairs.  I just noticed that there's some sort of berries growing on it.  Wonder what this is!  CAN I MAKE IT INTO JAM?!  Needs further research.

My Northern Garden 2015

My Northern Garden 2015
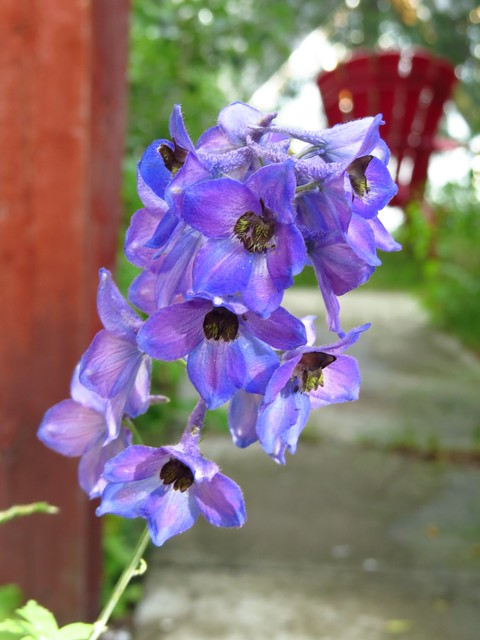
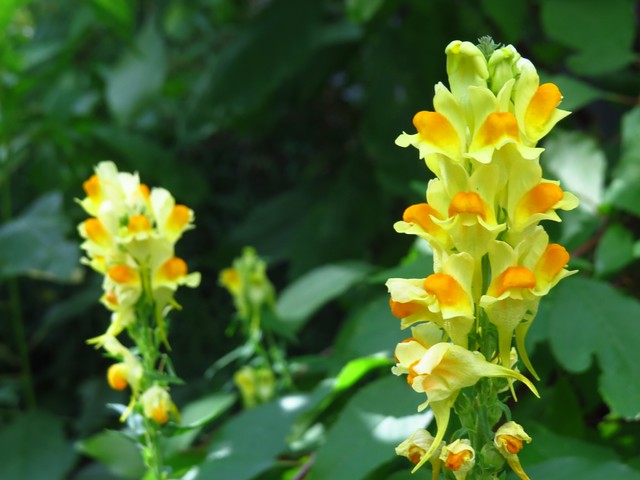
There's a ton of beautiful wild flowers along the side of the house.  Aside from the two above, there's also wild poppy, but it's done now.  I love the variety of wild flowers we have here in the Yukon.

My Northern Garden 2015
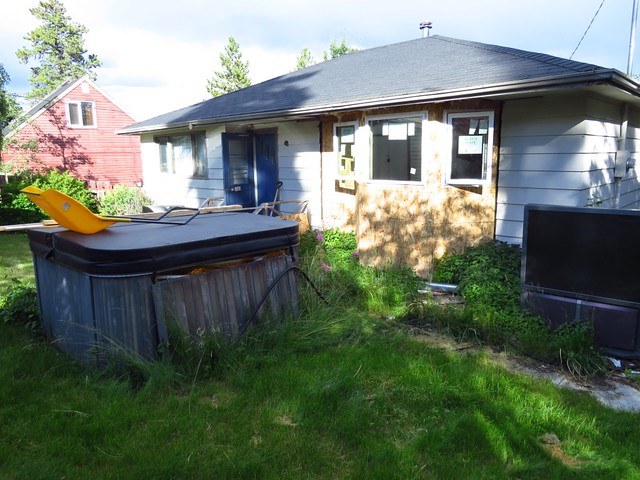
Backyard!  I know, it's horrible, but I blame it on renos.  The addition there will eventually be our master suite!  There's a sea of (admittedly pretty) weeds growing under that bay, but eventually I'd like to plant some tall flowers there.  The hot tub looks ugly, but it's glorious in the winter!  Nothing like sitting out in a hot tub under the stars and northern lights in -30C. 

My Northern Garden 2015
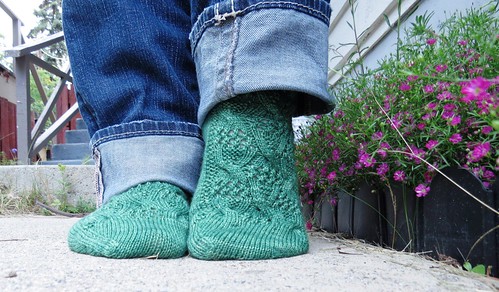
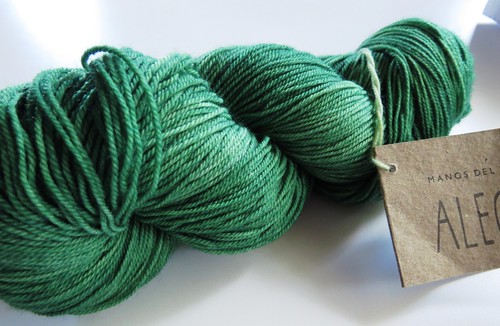
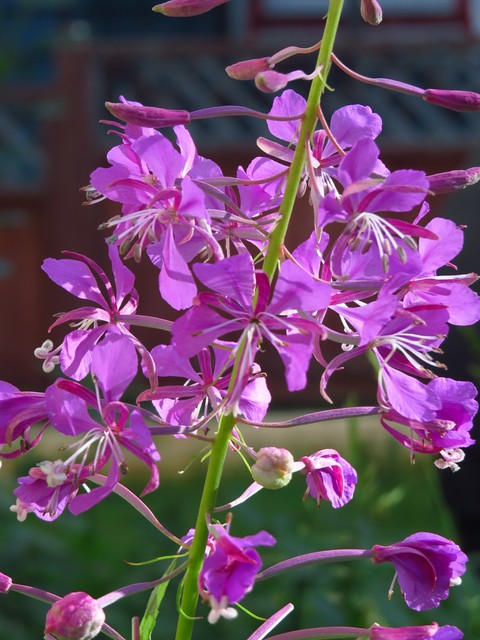
This is Fireweed, our Territorial flower.  It's my absolute favourite flower, and is entirely responsible for my new favourite colour.

My Northern Garden 2015
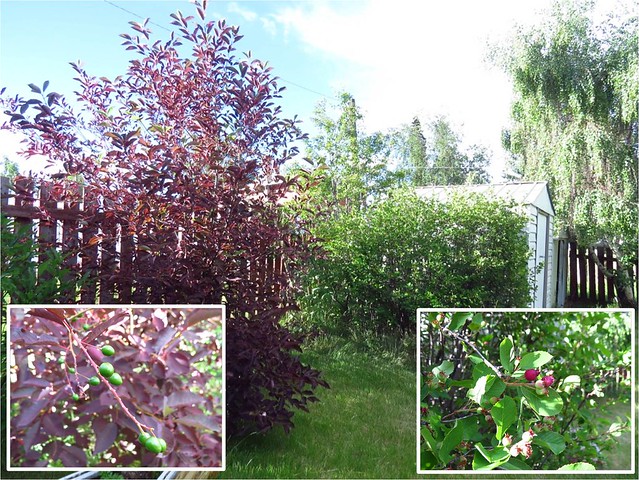
Chokecherry and Saskatoon berry bushes!  We also have a Chokecherry tree and Saskatoon tree in the yard, which is pretty cool.  I love the contrast in the leaves and berries in both plants right now.  I've made all sorts of things with these, including chokecherry syrup, saskatoon jam, and saskatoon pies!  Mmm I'm so excited for fresh saskatoon pie.

My Northern Garden 2015
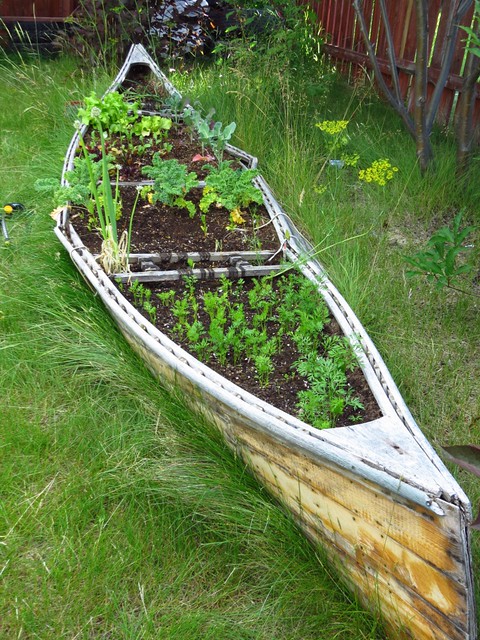
And oh hey, there's my canoe veggie garden!  It's not actually doing as well as last year, but I blame the squirrel.  You can see the carrots in the front there.

My Northern Garden 2015
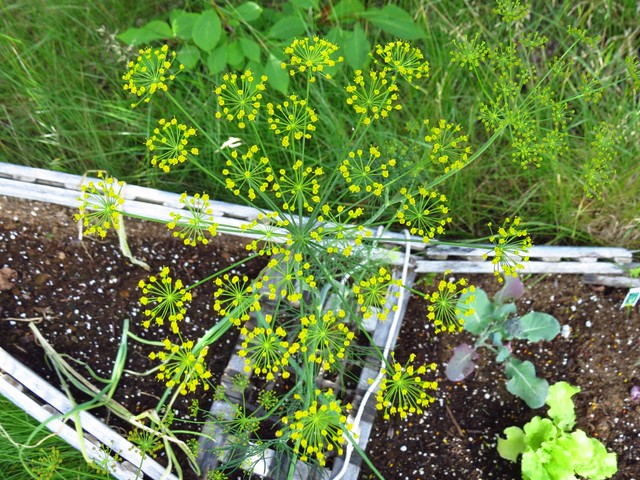
The onions on the other side are dying, for some reason.  At least the dill is doing well!  Doesn't the bloom look like fireworks?

My Northern Garden 2015
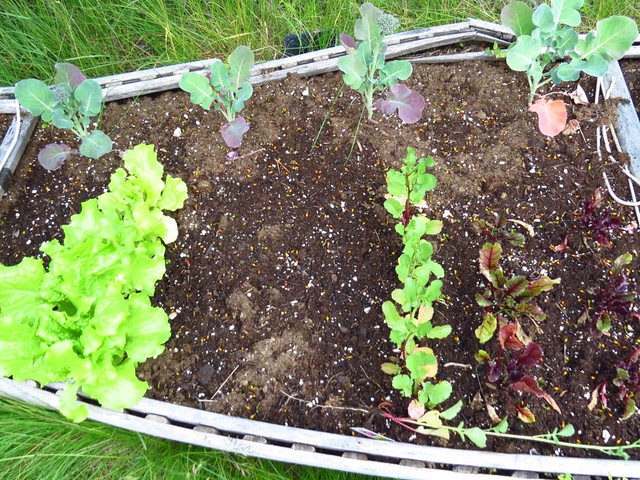
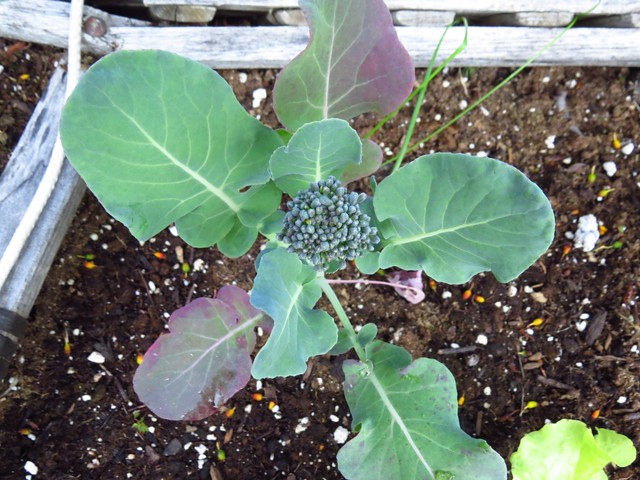
Broccoli across the top, with lettuce, radish, and beets across the bottom.  That big empty spot was supposed to be where I was supposed to stagger the radishes, but uh forgot.  I should get on that.

My Northern Garden 2015
Aren't these broccoli so cute?!  A man at the greenhouse told me they do really well here, and if I leave them over a couple of frosts, they'll be really sweet.  CURIOUS. 

My Northern Garden 2015
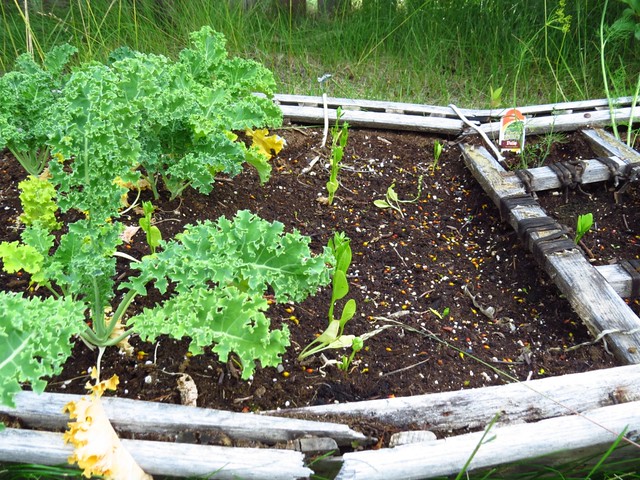
Kale and what was supposed to be spinach - which did well last year - but I fought a bitter battle with a squirrel this spring, and my spinach got caught in the cross-fire. :(

My Northern Garden 2015
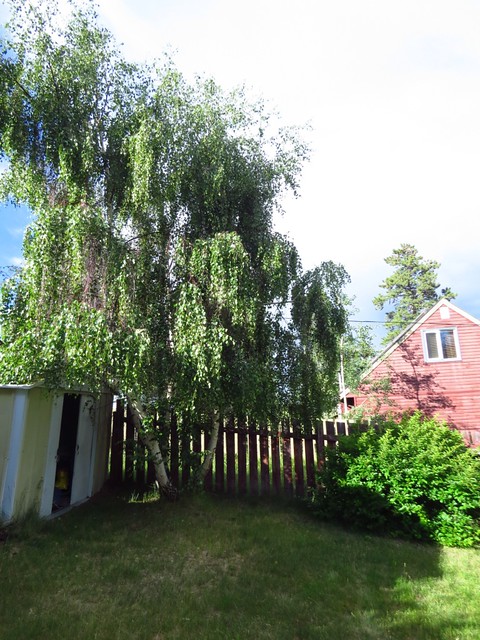
Don't know what kind of tree this is, but I keep calling it a weeping willow.  Looks more aspen or something, but whatever.  The bush to the right blooms pretty pink flowers in the spring - you can see them in this post.

My Northern Garden 2015
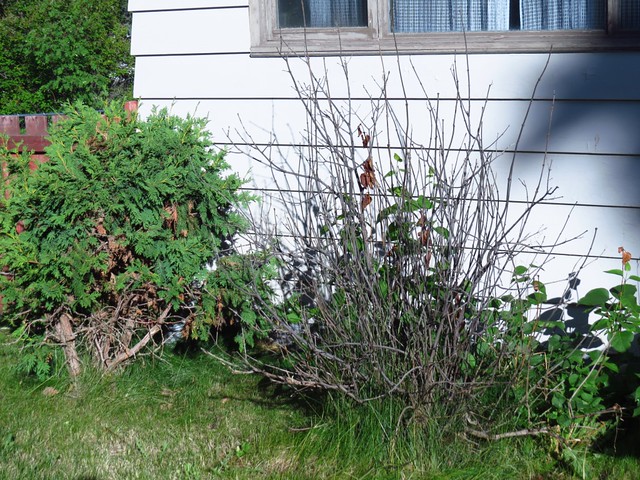
And last but not least, the dead bush that lives below my sewing room window.  I'm going to rip this out and plant raspberries!

I hope you enjoyed the tour around my yard.  I certainly did - it made me look at everything closer, and now I want to know what everything is in it.