I'm finally sewing up Darling Ranges from Megan Nielsen Patterns! I always feel like I'm the last to attempt these popular patterns. I've been half in love with this one forever, but I'm trying to work from patterns I already own (because I have a lot, and am half in love with most of them too). Except during Me-Made-May last year, I won a prize through a giveaway (more on that next time) that included this pattern. It's been on the back of my mind ever since, and as the pattern also came with fabric to sew the dress up in, obviously it was the one I reached for when I was considering a new project!
Except as usual, I knew I had to modify the pattern. A full bust adjustment was definitely in order.
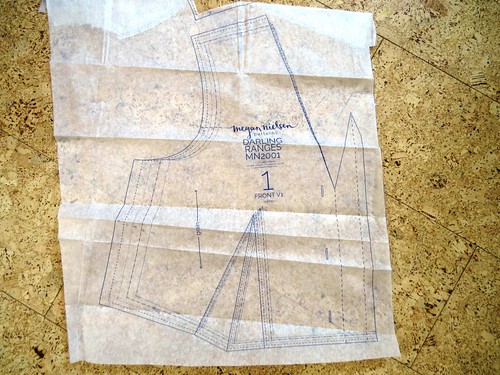
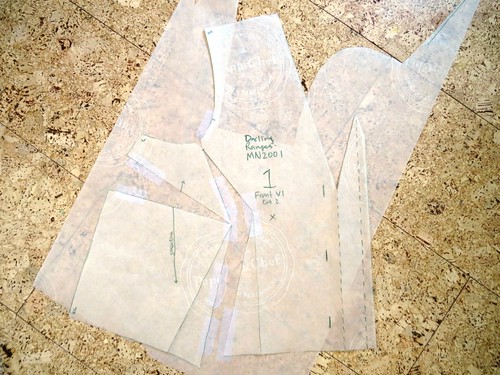
Since I was pursuing my Fit For Real People (FFRP) book to refresh my memory on how to do an fba, I decided to tissue fit the pattern. No pics of that process since I was just in my bra at the time, but it showed that I needed a 2 inches added to the piece (1 inch fba on each side).
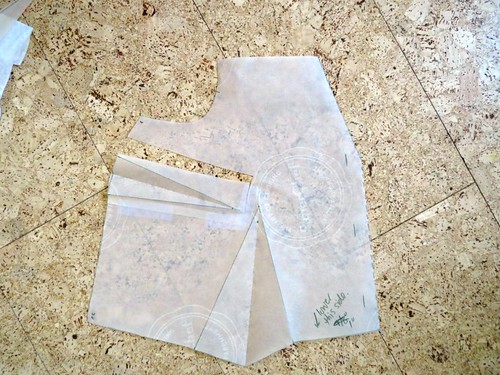
AND here's the final result. While tracing this version, I raised the neckline by about 1.25 inches as per Megan's tutorial. I probably should've rotated some more of that lower dart width to the side dart, but ah well. I think this'll do, and I'll make any further adjustments on the next dress. If there's another dress. I hope there is, because this one seems darling - lets see how it works on me!
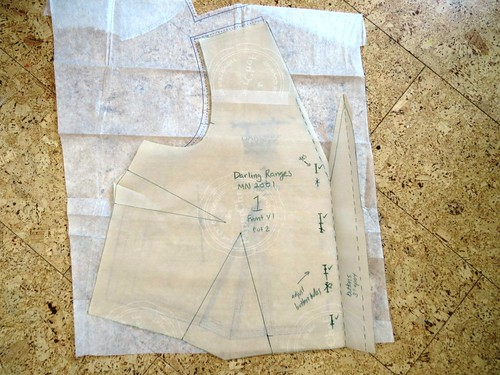
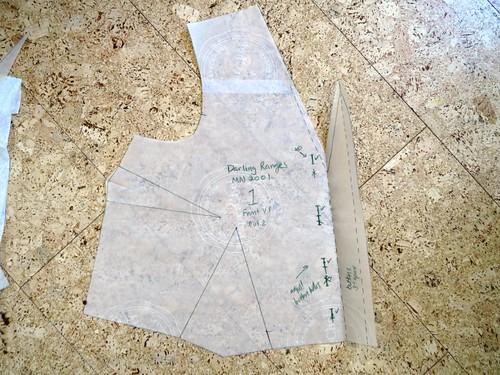
In case you're curious (I always am), this is how the piece stacked up against the original. I lined up the shoulder and the front centre edge since that hadn't changed much. You can see the width and length added to the piece (I'm a little worried about that added length, but the tissue fitting seemed to sit fine on me so we're just gonna give'er on that one), and the changes to the dart location and end point. I forgot to mention, but at some point I lowered the vertical dart a bit since it hit above my apex.
Yeah yeah, boring post. I haven't even showed you the fabric this'll be made from! Mostly I just wanted to write out my adjustments here for future reference. Hopefully I actually get to sewing this dress up, because I think it's going to be a great addition to my wardrobe, and I'm feeling like I need a change to my style. But more on that another time.
Geez these are a pain to do, but it's worth the time to adjust the pattern. What annoying-but-worthwhile pattern adjustments do you have to make?